
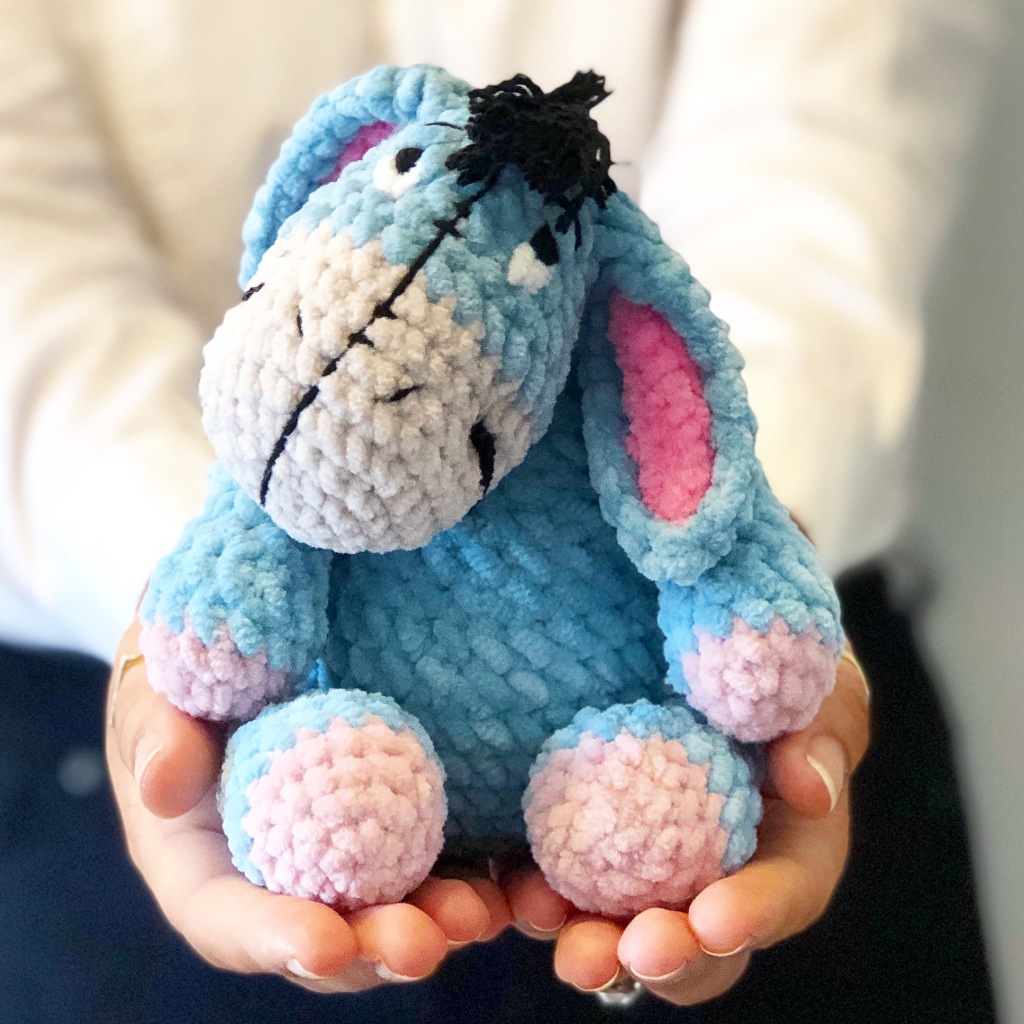
Winnie the Pooh and friends were some of my favourite characters when growing up. From furry diaries to carpets and blankets, it had to be Winnie the Pooh themed. So of course I had to recreate some of these loveable characters as amigurumis. They are all designed with chenille yarn to make them extra squishy. (It’s important that you use the yarns listed below or I can’t guarantee that the result will be the same.) My favourite thing about Eeyore here is that he can sit or lie flat, so he’ll look super cute on a shelf!


Please note, this pattern is for personal use only.
Materials used:
(You’ll only need one ball of yarn per colour)
Colour A: Cygnet Yarns Chenille Chunky, Sky
Colour B: James C Brett Flutterby Chunky, Oatmeal
Colour C: James C Brett Flutterby Chunky, Petal Pink
Colour D: James C Brett Flutterby Chunky, Pink (B12)
Colour E: James C Brett Flutterby Chunky, White
Colour F: Rico Ricorumi DK, Black
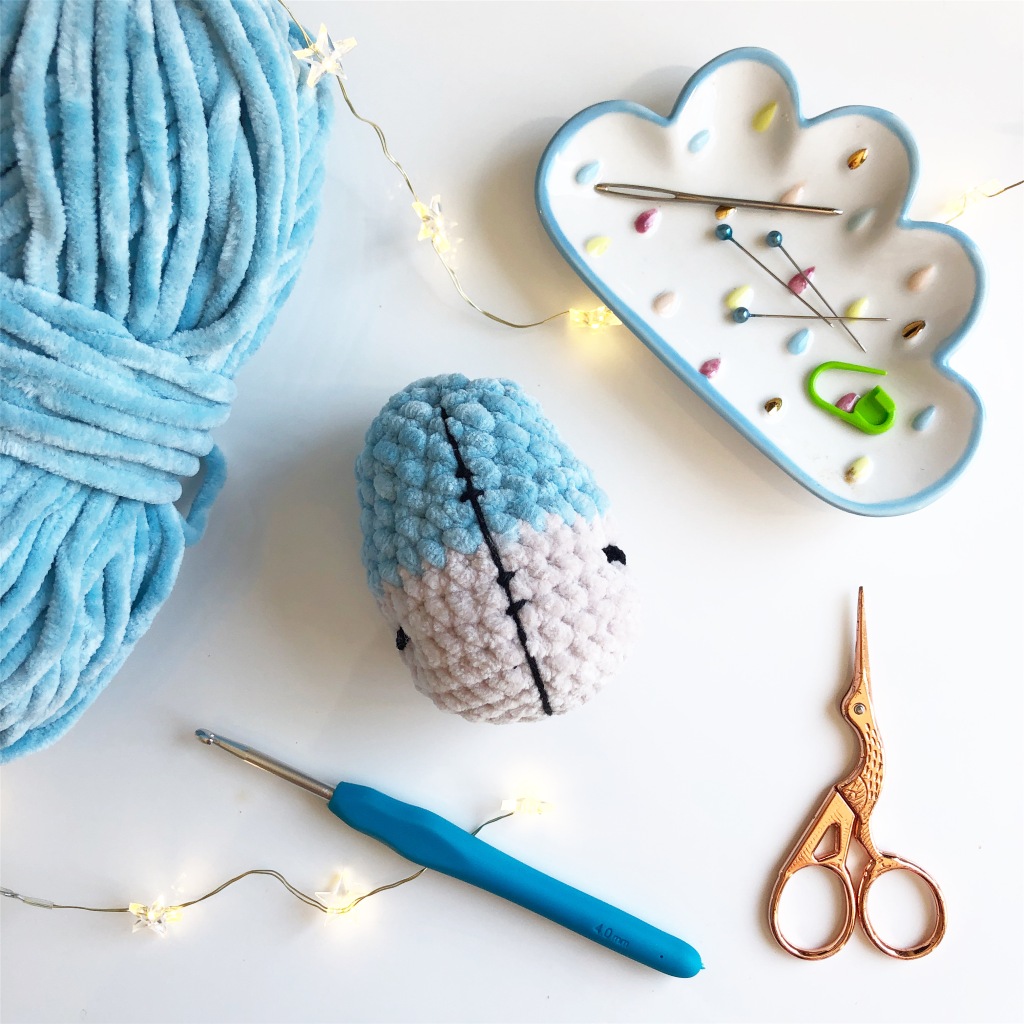
Crochet Hook: 4mm
Toy stuffing
Stitch marker
Head:
1. Using colour B, work 6 sc in magic ring (6)
2. Inc in each st (12)
3. *1 sc, 1 inc** repeat * to ** 6 times (18)
4. *2 sc, 1 inc** repeat * to ** 6 times (24)
5. *3 sc, 1 inc** repeat * to ** 6 times (30)
6-9. Sc in each st
10. Change to colour A, 3 sc, 1 inv.dec* repeat * to ** 6 times (24)
11. *2 sc, 1 inv.dec** repeat * to ** 6 times (18)
12-14. Sc in each st
15. *1 sc, 1 inv.dec** repeat * to ** 6 times (12)
Stop crocheting and stuff the head firmly.
16. Inv.dec in each st (6)
Fasten off leaving a long tail for sewing the last stitches together.
Face:
For the seam that goes down Eeyore’s face, using colour F, start from under the head where colour B ends and secure the thread. Now make a long stitch all the way up to round 15 of the head, make sure the thread is pulled tight without denting the face and secure in place. Make four small stitches across the thread between row 7-8, 8-9, 11-12 and 12-13.
The nostrils are sewn on across row 7, from bottom to top using colour F. The start of the stitch will be 2 stitches away from the face seam and the end will be 3 stitches away to get an angle.
The mouth is made with one long stitch, using colour F. Make a stitch between row 7 and 8, 7 stitches down from the middle seam on each side. The middle of the mouth will sit between row 5 and 6, use pins to keep in place before stitching in place. If you’d like to create some dimples you can pull a thread (colour B) through the muzzle connecting the two start points and pull tightly to create the dimples.
The eyes are sewn on across round 12 and 13, 2 stiches away fom the seam on each side. Using colour E, make 3 stiches across the 2 rows. Using colour F you’ll now only be stitching across row 13. Go up between the white stiches and keep going over in the same stitches for about 5 rounds, or until the white thread has been covered in the middle across row 13.
The eyelids are done by using colour A and making a semi loose stitch across where the black part of the eye end, slightly overlapping.
The eyebrows are sewn on across row 14, from top to bottom, using colour F. Starting 1 stitch away from the middle seam, make a diagonal stich so that the end of the stitch is 2 stiches away from the seam.
EARS (make 2):
Part 1:
Using colour A chain 11, turn
Sc in second st from the hook and across all 10 stitches
Sc across the 10 sts on the other side of the chain
Sc across both sides again, adding 1 extra st on each end
Fasten off, leaving a long tail for attaching the ears to the head.
Part 2:
Using colour D chain 9, turn
Sc in second st from the hook and across all 8 stitches
Sc across the 8 sts on the other side of the chain
Fasten off, leaving a long tail for sewing the two parts together.
Sew part 2 to the middle of part 1.
Using colour A, make a couple of stitches on the end of each ear across 2 stitches to make it look pointed.
Attach the ears between row 14 and 15 with 4 sts in between.
Body:
1. Using colour A, work 6 sc in magic ring (6)
2. Inc in each st (12)
3. *1 sc, 1 inc** repeat * to ** 6 times (18)
4. *2 sc, 1 inc** repeat * to ** 6 times (24)
5. *3 sc, 1 inc** repeat * to ** 6 times (30)
6. *4 sc, 1 inc** repeat * to ** 6 times (36)
7-10. Sc in each st
11. *4 sc, 1 inv.dec** repeat * to ** 6 times (30)
12. Sc in each st
13. *3 sc, 1 inv.dec** repeat * to ** 6 times (24)
14-15. Sc in each st
16. *2 sc, 1 inv.dec** repeat * to ** 6 times (18)
17. Sc in each st
18. *1 sc, 1 inv.dec** repeat * to ** 6 times (12)
19-20. Sc in each st
Fasten off leaving a long tail for sewing the last stitches together.
Stuff the body firmly before closing up the body with a flat seam across your stitches. Attach to round 12 of the head. You should be able to tilt Eeyore’s head up and down so he can lie flat as well as sit.
Legs (make 2):
1. Using colour C, work 6 sc in magic ring (6)
2. Inc in each st (12)
3. *2 sc, 1 inc** repeat * to ** 4 times (16)
4. Sc in each st
5-6. Change to colour A, sc in each st
7. *2 sc, 1 inv.dec** repeat * to ** 4 times (12)
8. *4 sc, 1 inv.dec** repeat * to ** 2 times (10)
9-13. Sc in each st
Fasten off leaving a long tail for sewing the last stitches together.
Stuff the larger bottom part of the foot firmly and the upper part lightly.
As with the body, the legs are closed up with a straight seam across the top.
Attach the legs between row 6 to 10 of the body.
Arms (make 2):
1. Using colour C, work 6 sc in magic ring (6)
2. Inc in each st (12)
3. Sc in each st
4-5. Change to colour A, sc in each st
6. *1 sc, 1 inv.dec** repeat * to ** 4 times (8)
7-13. Sc in each st
Fasten off leaving a long tail for sewing the last stitches together.
Stuff the larger bottom part of the arm firmly and the upper part lightly.
Close up the arm with a straight seam across the top.
Attach the arms between row 16 to 18 of the body.
Tail:
1. Using colour A, chain 9, turn
2. Sc in the second st from the hook and across all 8 sts
Fasten off leaving a long tail for attaching the tail to the body.
Using colour F, cut 10 lengths of 5cm, fold each length in half. Using your hook, pull the folded end through the bottom of the tail and put the non-folded part through the hoop. Continue across the bottom of the tail.
Use a needle to separate the strands of the yarn to make it look a bit bushier, trim the strands to get a straight end.
Attach the tail to row 8 of the body.
Bow:
1. Using colour D, chain 7, turn
2. Sc in the second st from the hook and across all 6 st
3. Sc across the 6 stitches on the other side
Fasten off leaving a long tail for the middle part, make sure it’s long enough to also attach the bow to the tail.
Using the long tail, do 3 loops around the middle of the chain to create a bow like shape.
Secure in place and use the same tail to attach the bow just above where you added the black yarn.
Hair:
Using colour F, cut 20-25 lengths of 5cm.
(Keep adding until you’re happy with the coverage.)
Using the same method as with the tail attach the strands to the top of Eeyore’s head, starting in the row above the eyebrows and down the back of his head in a straight line.
Once you’re done trim the hair so that it’s shorter down the back of the head and longer on top. The top will need trimming as well.
Separate the strands as you did with the tail.
Ta-da! Your Eeyore is complete! 🥳


You do such an awesome job on all of your Disney Characters!
LikeLiked by 1 person
Thank you so much, that’s lovely to hear 🤗
LikeLike
I really appreciate you taking the time in allowing us to follow this pattern! I was curious, is it possible if I make a YouTube video of me instructing how to do the pattern (For those who cannot/don’t know how to follow patterns) Obviously I would give you credits along with including a link to the written pattern in my description box. It’s completely fine if not! I was just curious to ask for permission before I got too ahead of myself loll!
LikeLike
Hi, thank you for asking! 🙂 My patterns are for personal use only and should not be reproduced. Cat x
LikeLike
Alright! Thanks for you’re time to respond <3!
LikeLike
ON THE EYORE PATTERN WHAT DOES 1INV.DEC MEAN
LikeLike
1 invisible decrease
LikeLike
Hi I’m not sure how else to let you know but someone is selling your pattern on etsy. They stole the entire pattern along with your pictures. Profile has been reported by me but they go by xingluyushop
LikeLike
Hi, thanks I’m aware. Have reported as well
LikeLike