Please note, this pattern is for personal use only (this means you should not be selling your makes).
This pattern does not come with crochet lessons, basic crochet skills and knowledge is needed.
The shaping of the face will require a fair bit of sewing.
To achieve the same size and look you’ll need to use the yarn types and weights below.
Materials:
(One ball of each colour is needed)
Colour A: Hobbii – Baby Snuggle Solid – Baby Duck (07)
Colour B: Cygnet Chenille Chunky – Petrol (4999)
Colour C: Cygnet Chenille Chunky – Sky (4870)
Colour D: James C Brett Flutterby Chunky – White (B1)
Colour E: James C Brett Flutterby Chunky – Pink (B12)
Colour F: Rico Ricorumi DK – Black (060)
Colour G: Rico Ricorumi DK – Pistachio (047)
Colour H: Rico Ricorumi DK – White (001)
A bit of DK cotton yarn in a similar colour to colour A
Crochet hooks:
Chenille yarn: 4mm
Cotton DK: 2.5mm
Body:
1. Using colour A, work 6 sc in magic ring (6)
2. Inc in each st (12)
3. [1 sc, 1 inc] x6 (18)
4. [2 sc, 1 inc] x6 (24)
5. [3 sc, 1 inc] x6 (30)
6. [4 sc, 1 inc] x6 (36)
7. [5 sc, 1 inc] x6 (42)
8. [6 sc, 1 inc] x6 (48)
9. [7 sc, 1 inc] x6 (54)
10. [8 sc, 1 inc] x6 (60)
11. [9 sc, 1 inc] x6 (66)
12. [10 sc, 1 inc] x6 (72)
13. [11 sc, 1 inc] x6 (78)
14. [12 sc, 1 inc] x6 (84)
15-16. Sc in each st
17. [12 sc. 1 inv.dec] x6 (78)
18. Sc in each st
19. [11 sc. 1 inv.dec] x6 (72)
20. Sc in each st
21. [10 sc. 1 inv.dec] x6 (66)
22. Sc in each st
23. [9 sc. 1 inv.dec] x6 (60)
24. Sc in each st
25. [8 sc. 1 inv.dec] x6 (54)
26. Sc in each st
27. [7 sc. 1 inv.dec] x6 (48)
28. Sc in each st
29. [6 sc. 1 inv.dec] x6 (42)
30. Sc in each st
31. [5 sc. 1 inv.dec] x6 (36)
32-33. Sc in each st
Start stuffing the body firmly
34. [4 sc. 1 inv.dec] x6 (30)
35-37. Sc in each st
38. [3 sc. 1 inv.dec] x6 (24)
39-42. Sc in each st
43. [2 sc. 1 inv.dec] x6 (18)
44-46. Sc in each st
Top up on the stuffing.
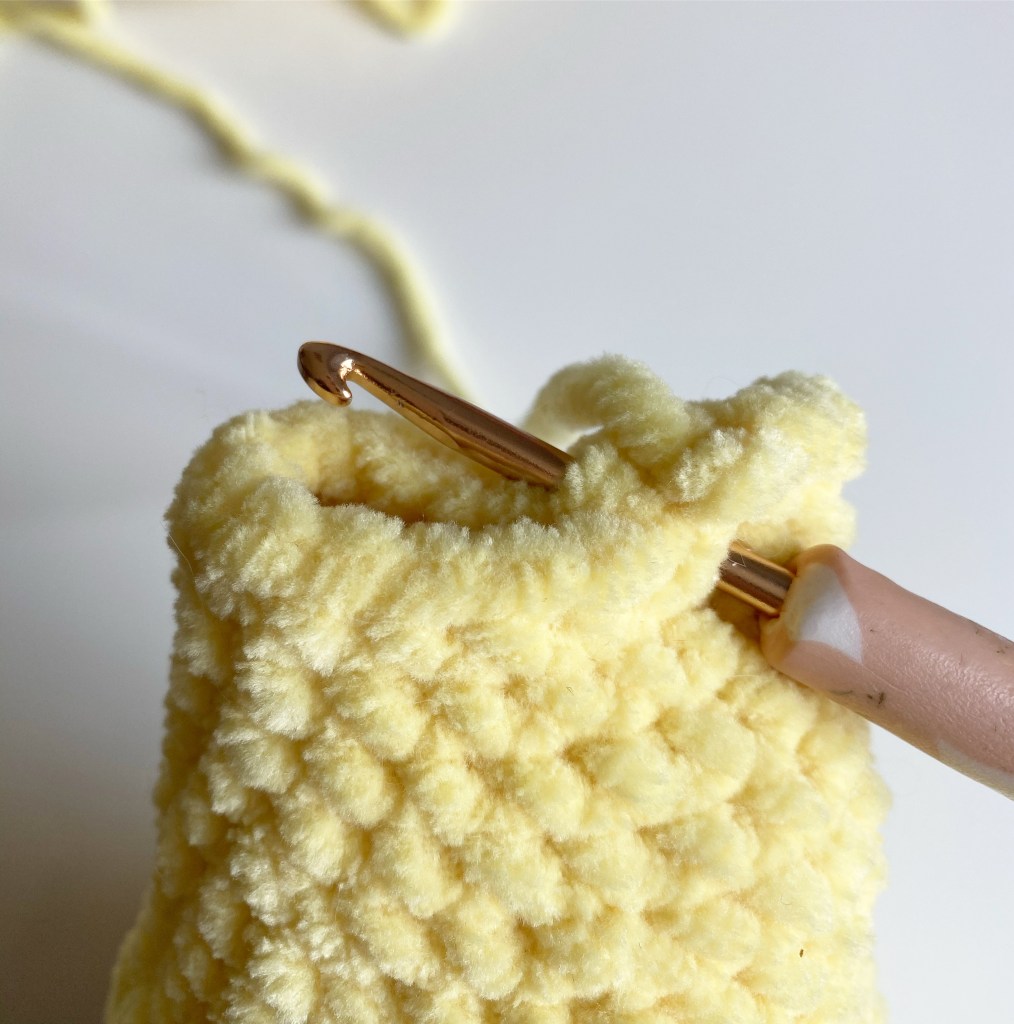
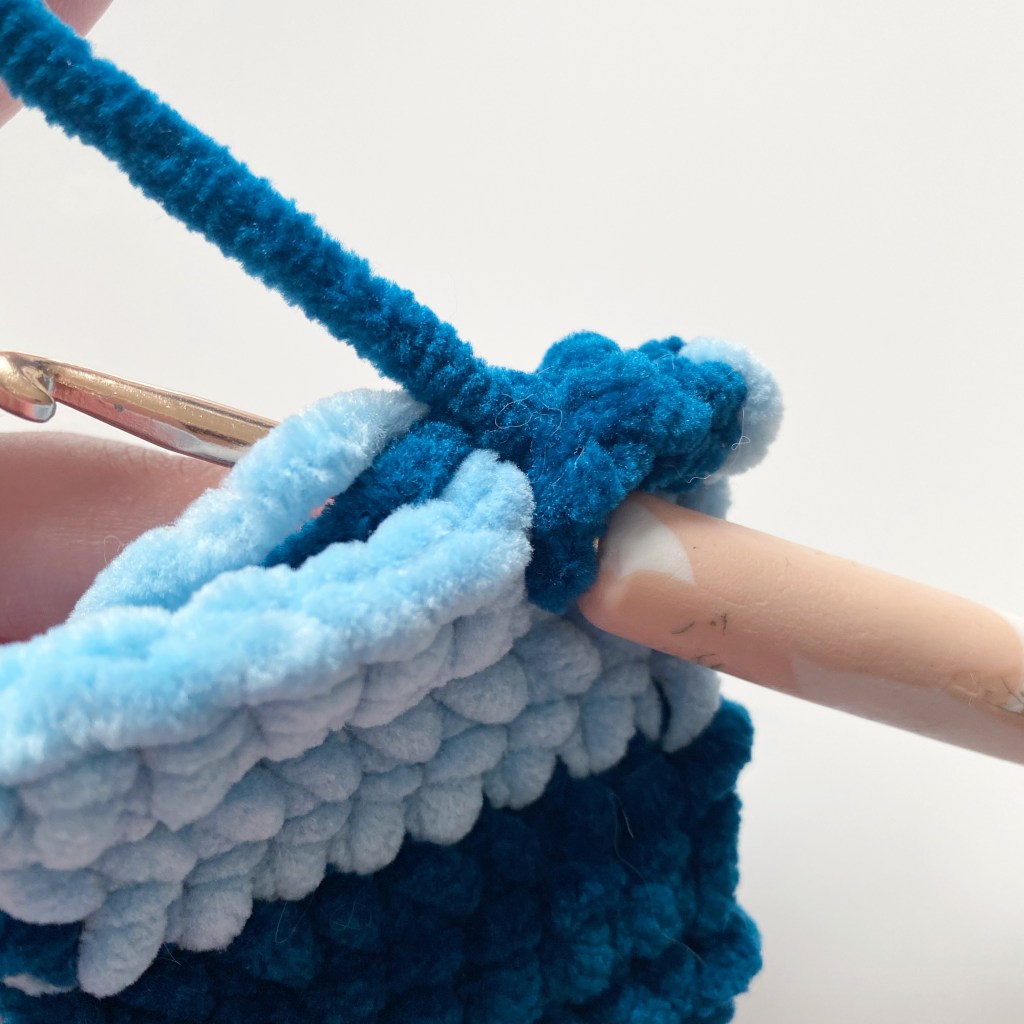
You’ll now crochet through both layers to close the opening, see image below.
Fasten off and tie in the loose end.
Using pins, mark the middle of the top of the body and down the middle of the face, this will help align the tail and face shaping later.

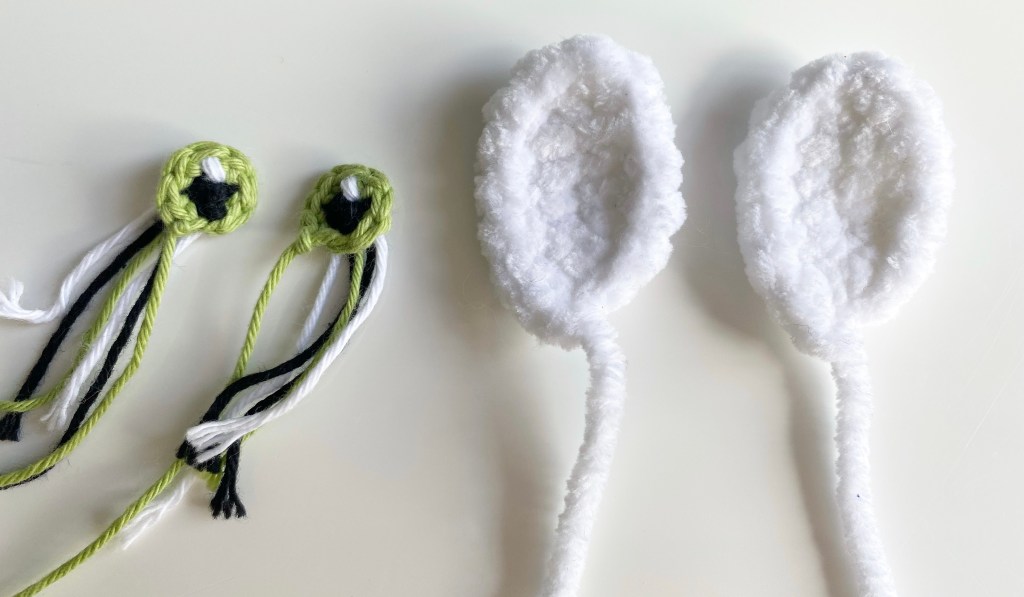
Eyes – white part (make 2):
1. Using colour D, ch 7, sc 6 starting in the second ch from the hook, sc 6 down the other side of the chain (12)
2. [Sc 5, inc] x2 (14)
Sl st in next st and fasten off, leaving a long tail for attaching later.
Eyes – pupils (make 2):
1. Using colour F, work 4 sc in magic ring (4)
2. Change to colour G, [inc] x4 (8)
Sl st in next st and fasten off, leaving a long tail for attaching later.
Using a tail of colour H and a tapestry needle, make a stitch in row 2, go over 2 more times.
Mouth:
1. Using colour E, work 6 sc in magic ring, ch 1 (does not count as st), turn (to create a half circle) (6)
2. [Inc] x6, change to colour A, ch 1 (does not count as st), turn (12)
3. [1 sc, inc] x 6, ch 1 (does not count as st), turn (18)
4. Sc in BLO
Fasten off, leaving a long tail for attaching later.

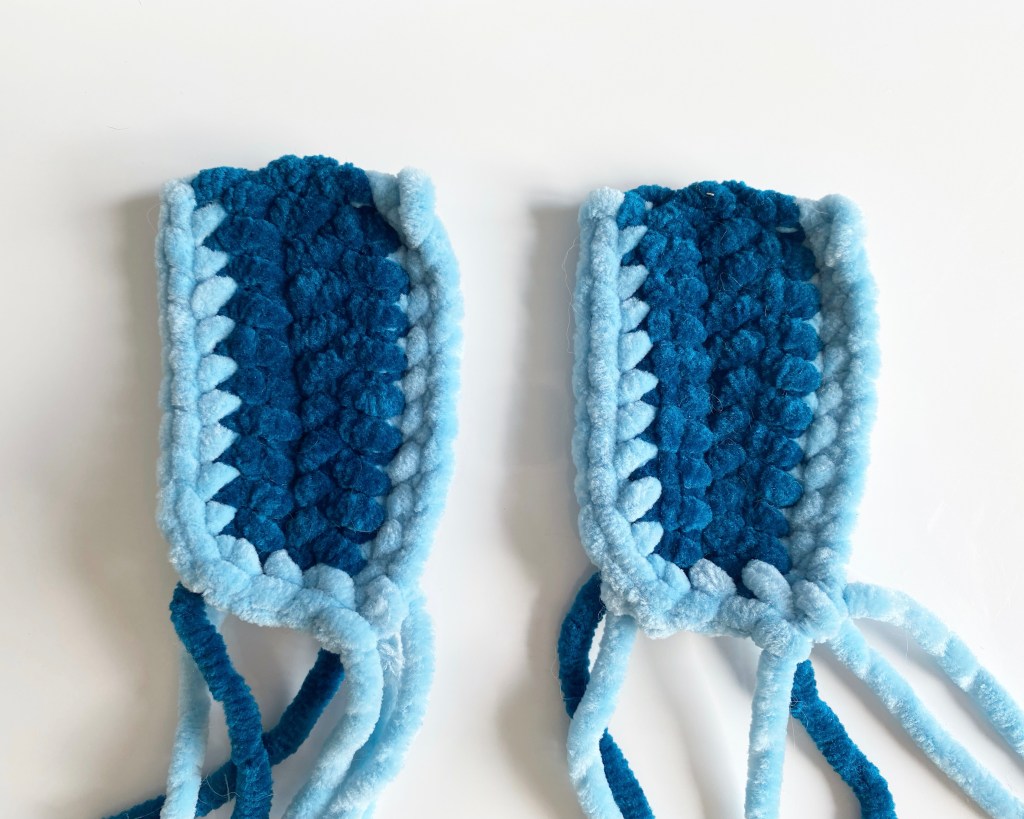
Side fins (make 2):
1. Using colour C, ch 11, sc 10 starting in the second ch from the hook, ch 1 (does not count as st), turn (10)
2. Change to colour B, sc 10, ch 1 (does not count as st), turn (10)
3. Hdc 5, sc 5, ch 1 (does not count as st), turn (10)
4. Sc in each st
5. Change to colour C, sc 10, sc 4 down the side
Fasten off leaving a long tail for attaching later.

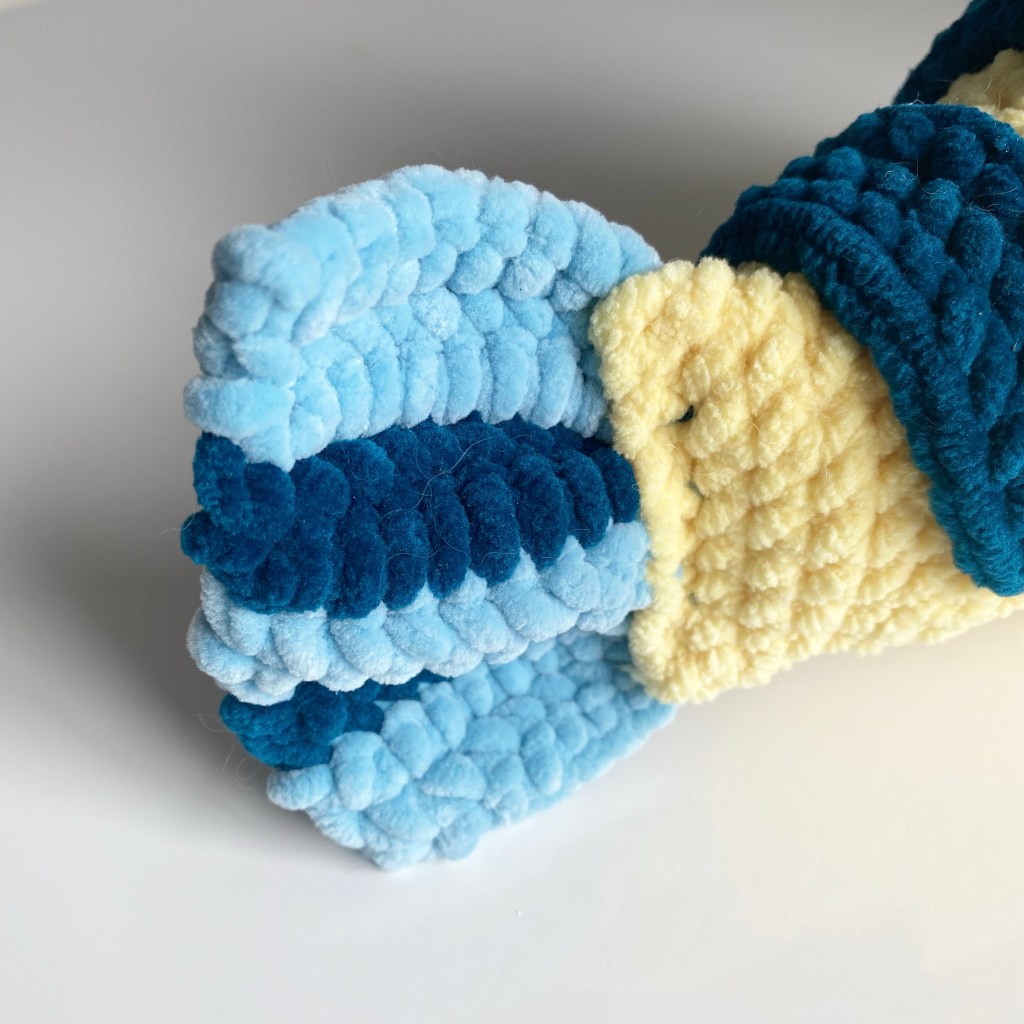
Stripes x4:
(From long to short below)
Stripe 1:
1. Using colour B, ch 35, sc 34 starting in the second ch from the hook, sc 34 down the other side of the chain (68)
2. Sc 33
Sl st in the next st and fasten off leaving a long tail for attaching later.
Stripe 2:
1. Using colour B, ch 30, sc 29 starting in the second ch from the hook, sc 29 down the other side of the chain (58)
2. Sc 28
Sl st in the next st and fasten off leaving a long tail for attaching later.
Stripe 3:
1. Using colour B, ch 23, sc 22 starting in the second ch from the hook, sc 22 down the other side of the chain (44)
2. Sc 21
Sl st in the next st and fasten off leaving a long tail for attaching later.
Stripe 4:
1. Using colour B, ch 17, sc 16 starting in the second ch from the hook, sc 16 down the other side of the chain (32)
2. Sc 15
Sl st in the next st and fasten off leaving a long tail for attaching later.
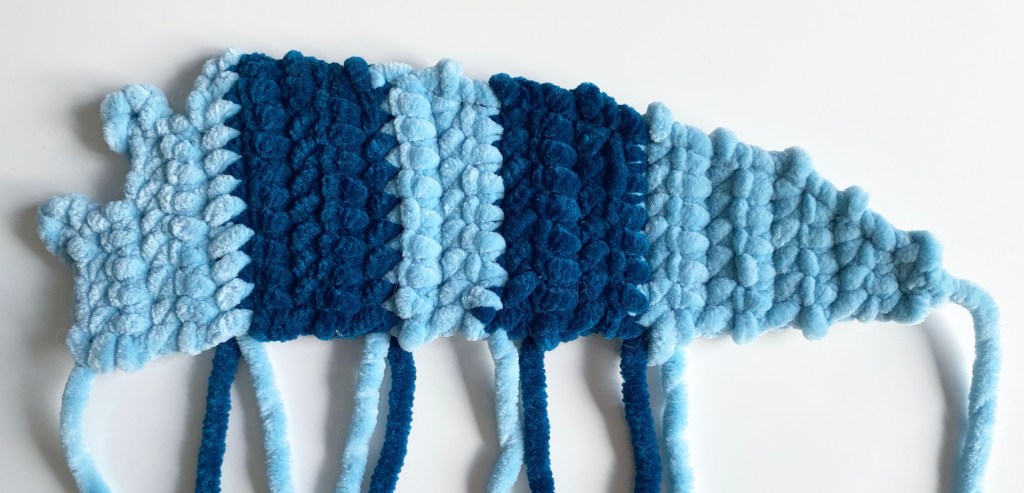
Dorsal fin:
When doing a colour change at the top of the fin, simply carry the yarn from the previous colour and the starting tail of the new colour behind the stitches as per image below.
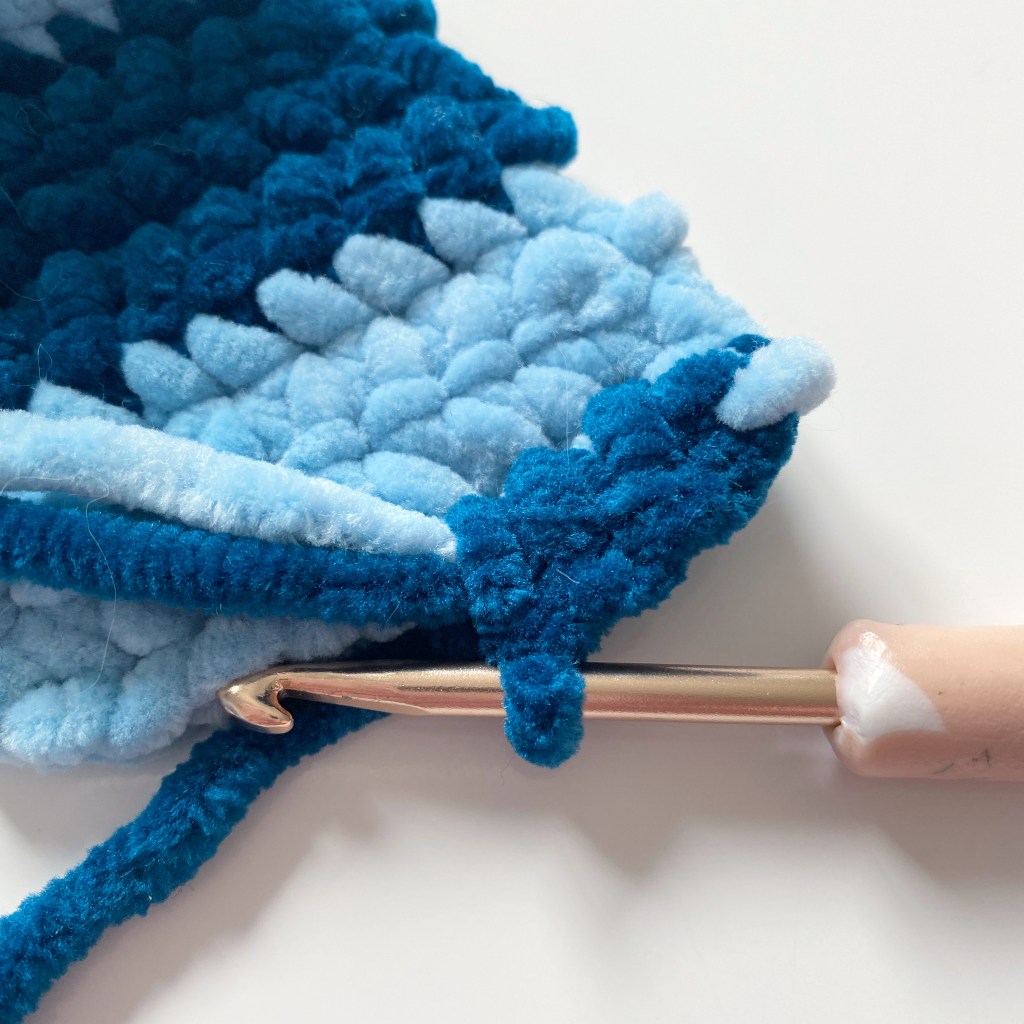
After each row, ch 1 (does not count as stitch) and turn.
1. Using colour C, ch 3, sc 2 starting in the second ch from the hook (2)
2. Sc 1, inc (3)
3. Inc, sc 2 (4)
4. Sc 3, inc (5)
5. Inc, sc 4 (6)
6-7. Sc in each st
8. Sc 5, inc (7)
9. Sc in each st
10. Change to colour B, sc in each st
11. Inc, sc 6 (8)
12-13. Sc in each st
14. Change to colour C, sc in each st
15. Inc, sc 7 (9)
16. Sc in each st
17. Change to colour B, sc in each st
18. Sc 8, inc (10)
19-20. Sc in each st
21. Change to colour C, inc, sc 9 (11)
22. Sc 8, ch 4
23. Sl st in the 5 st from the hook (meaning you’ll skip the 4 new chains), sc 7
24. Sc 5, ch 4
25. Sl st in the 5 st from the hook (meaning you’ll skip the 4 new chains), sc 4
Fasten off leaving a long tail for attaching later.
Tail fin:
After each row, ch 1 (does not count as stitch) and turn
1. Using colour C, ch 9, sc 8 starting in the second ch from hook (8)
2-3. Sc in each st
4-5. Change to colour B, sc in each st
6-8. Change to colour C, sc in each st
9-10. Change to colour B, sc in each st
11-13. Change to colour C, sc in each st
Fasten off, leaving a long tail for attaching later.

Face shaping:
Nose:
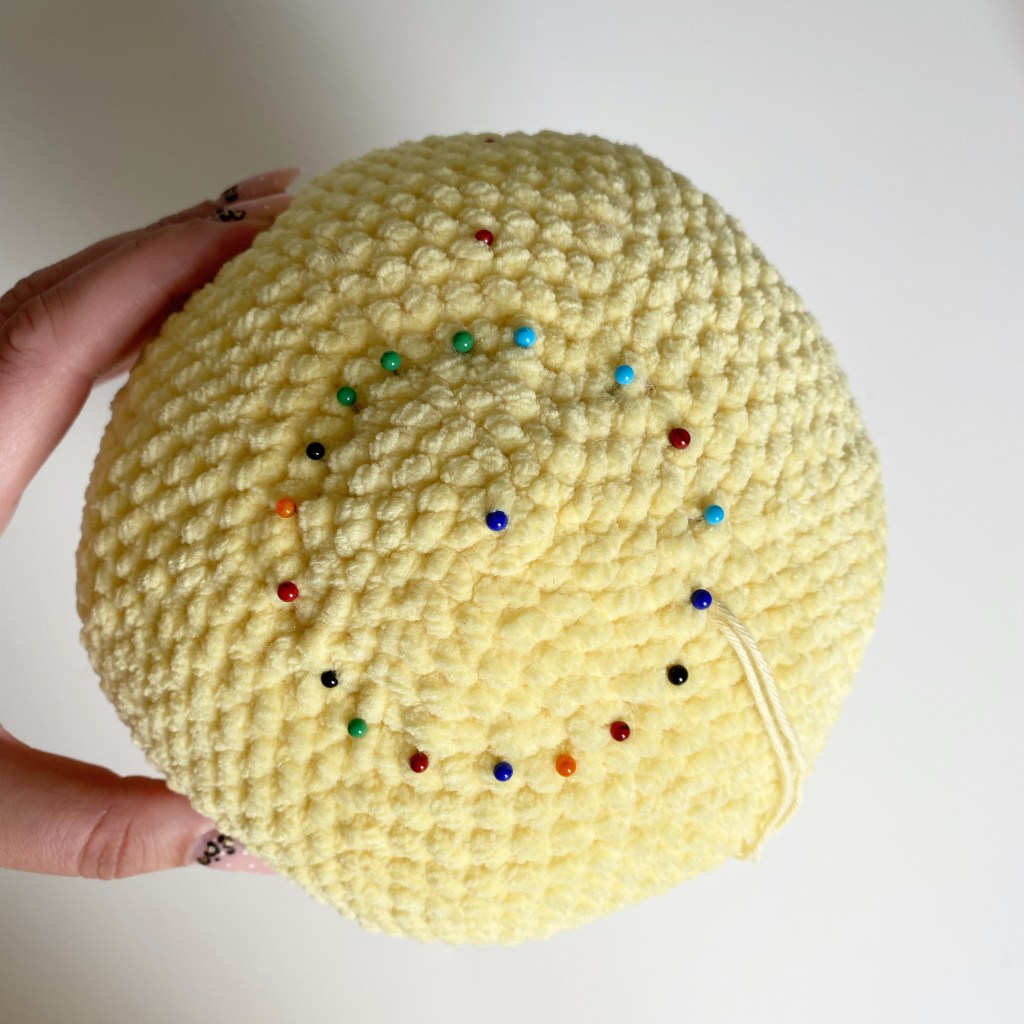
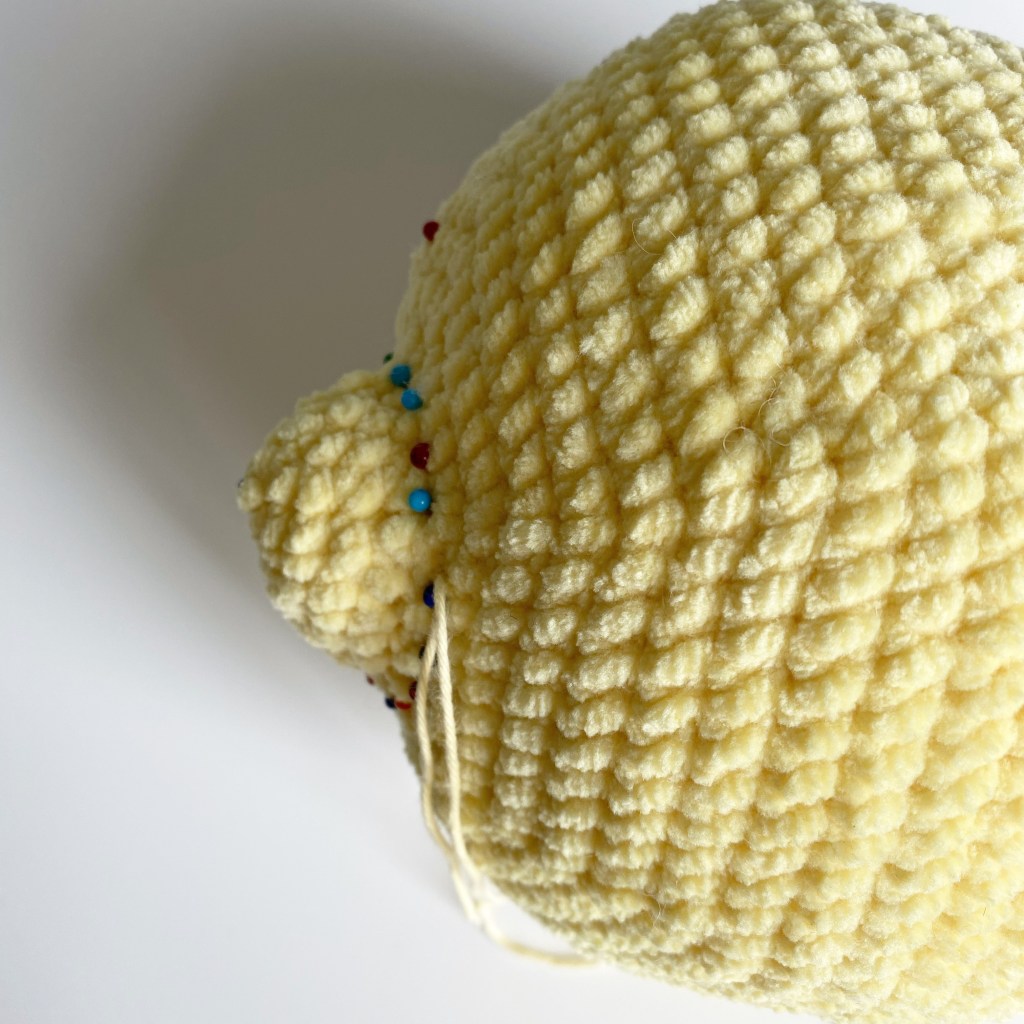
Starting with the “nose”, mark the following with pins to ensure you have an even circle around the starting magic ring of Flounders face.
Start by adding a pin in the centre of the magic ring to help as a guide.
The pins you added to mark the middle of the top of the body and down the middle of the forehead should help guide where you add the following.
Place the top pin 4 rows up from the middle.
Place the bottom pin 6 rows down from the middle.
(It’s important you get the spacing above and below correct or the proportions will be off.)
Place the side pins 5 rows out from the middle, on each side.
Now add the rest of the pins in between to create a circle.
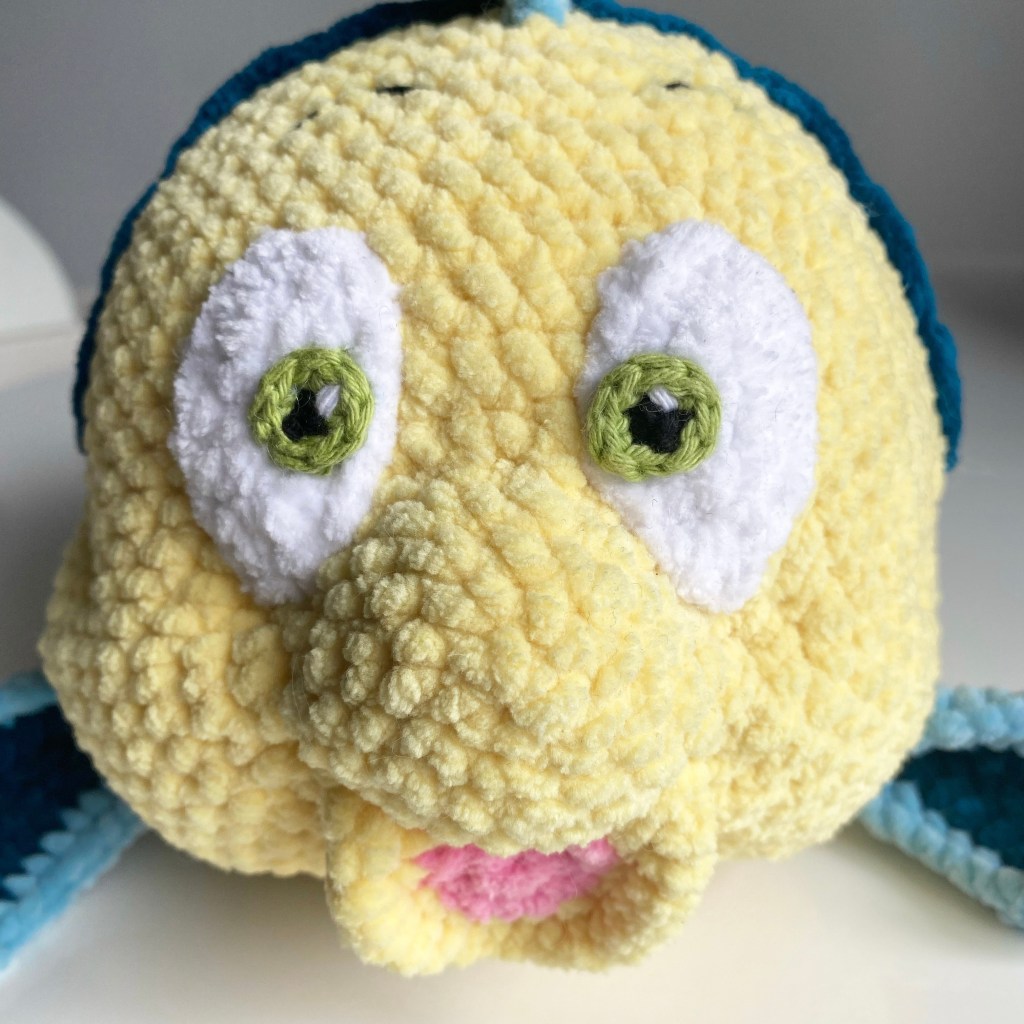
Using a tail of DK cotton yarn in a similar colour and a tapestry needle, sew a running stitch around the marked circle and pull tight until you get the same shape as below. Secure with a knot and sew in the loose ends. You can remove the pins now, but keep the one in the centre of magic ring.

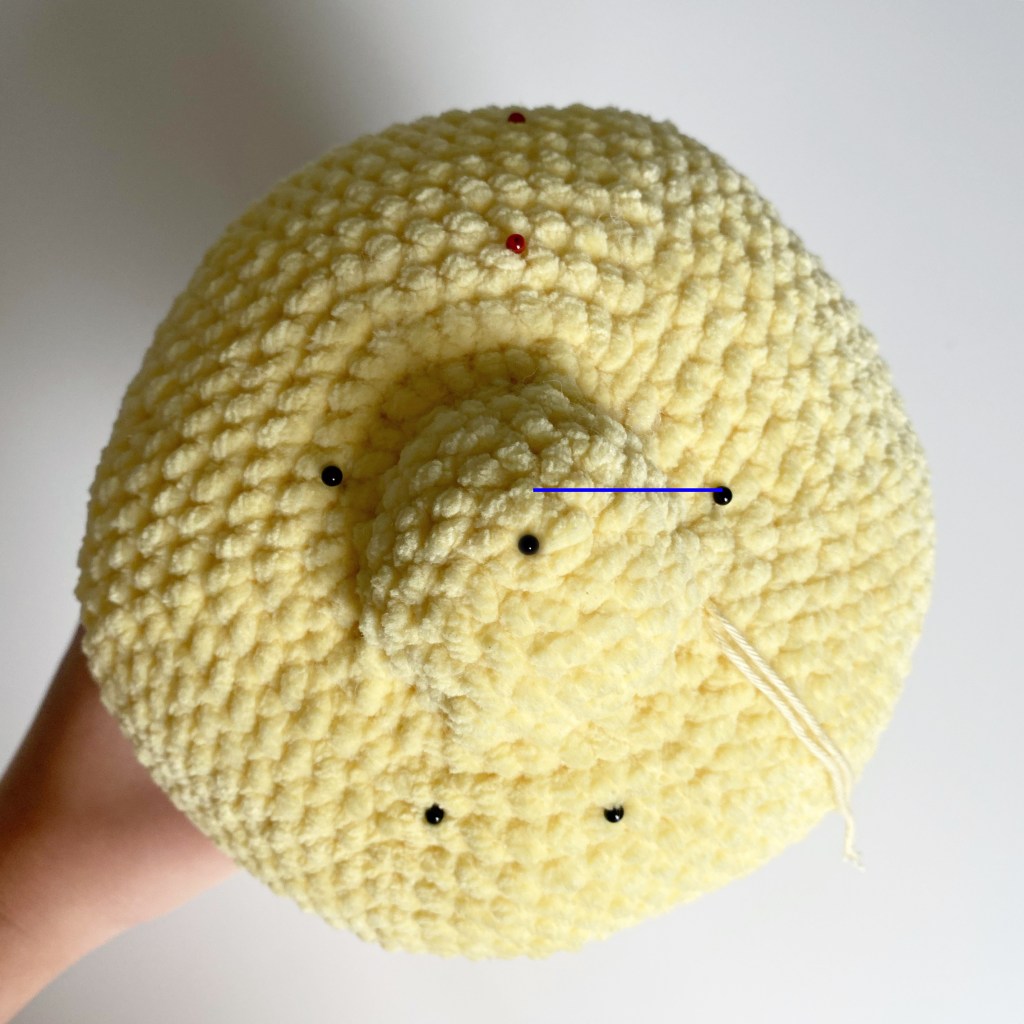
Cheeks:
You’ll now mark where the first indents for the cheeks will sit.
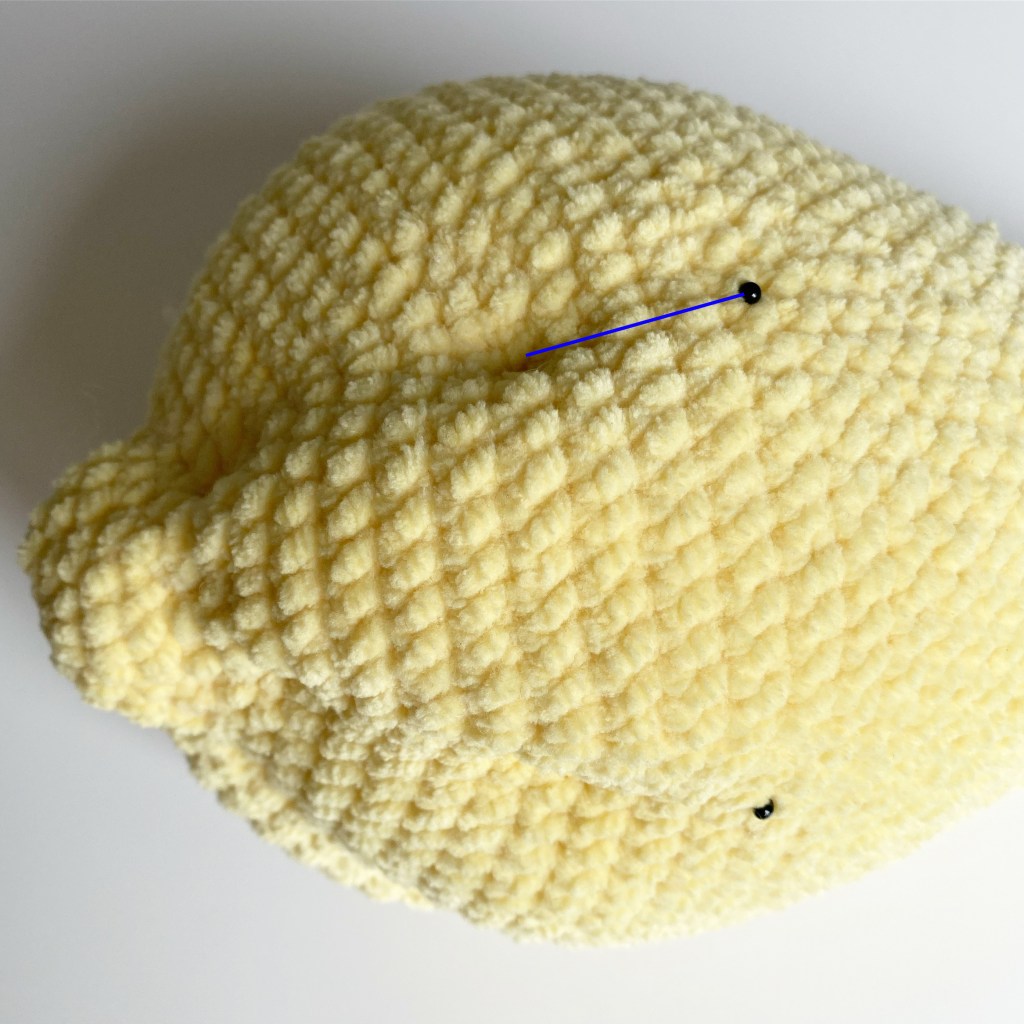
Count 6 rows out from the middle on each side, go one row up and mark with a pin (see blue line on image below for guidance).
Count 7 rows down from the middle, add 2 pins with 5 sts in between, make sure the 5 sts are centred to the middle pin.
Using a tail of DK cotton yarn in a similar colour make a stitch inside the face between the two points and re-enter the needle one row over and exit one row away from entry stitch (see image below for guidance). Now go up in to the same st again and pull tight to create the dent as per image below, go back down and secure in place, tie in loose ends.

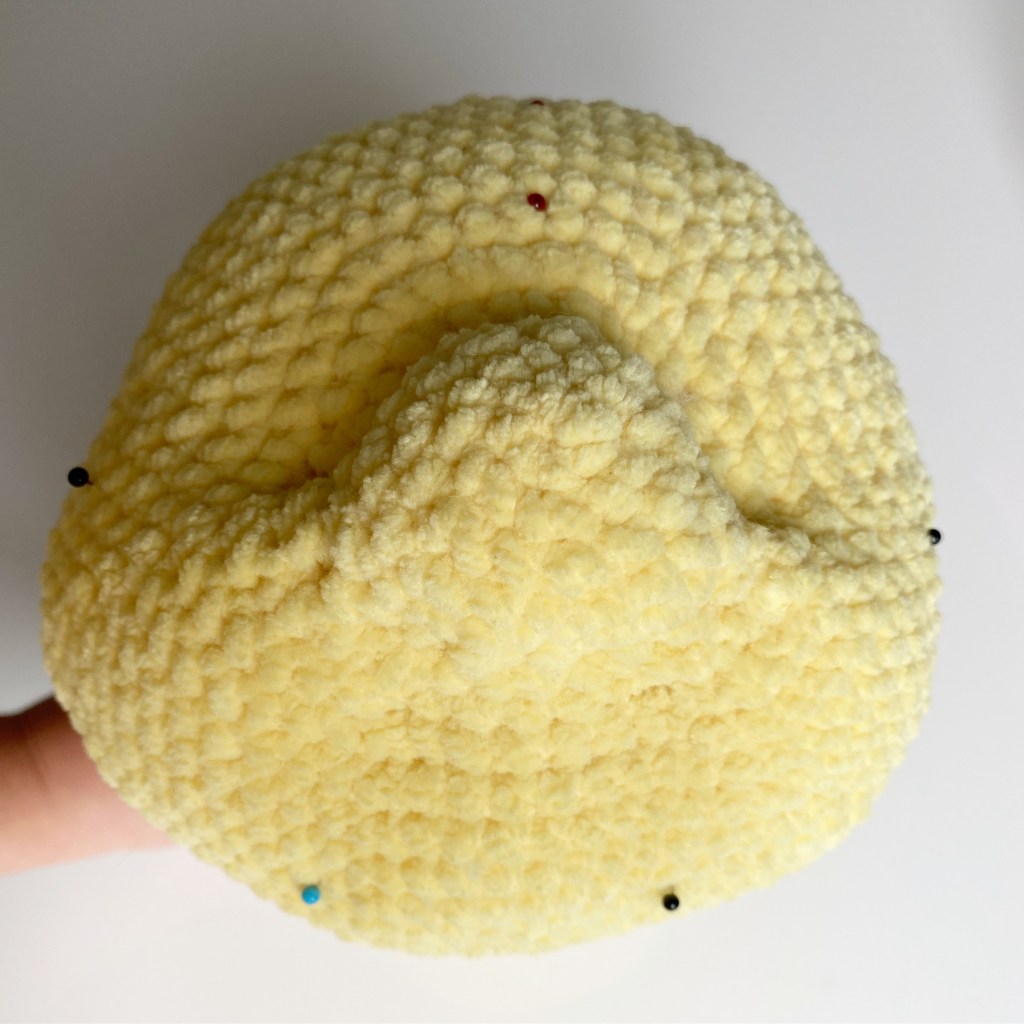
The second indent is made in row 13 from the middle, follow the line of stitches from the first indent, and go one stitch down, see image below for guidance.
The bottom pins are added to row 13, down from the middle, with 10 sts in between.
Create the indents in the same way as you did with the first ones, but do not tighten as much, you want the cheek to get gradually bigger towards the back (see image below).
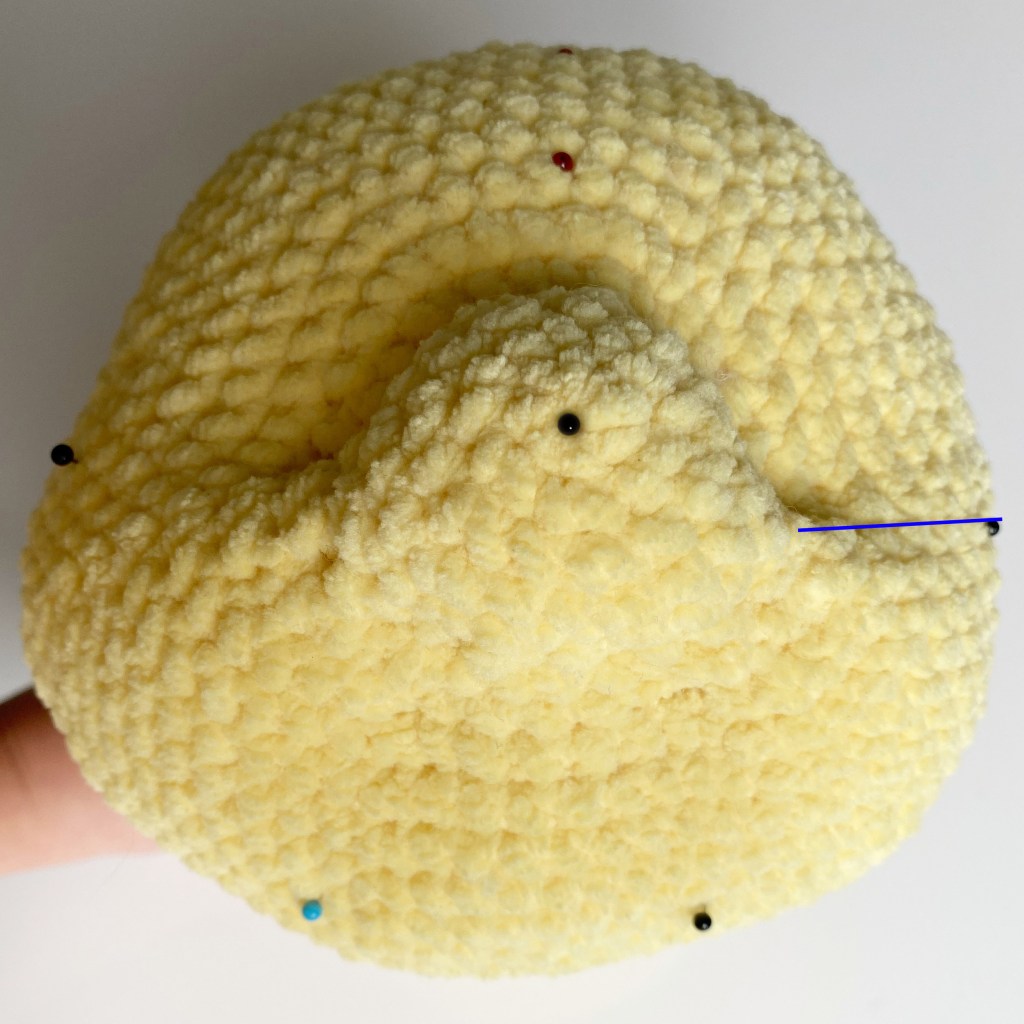
The third indents will sit in row 18 from the middle, follow the line of stitches from the second indent, and add a pin to mark.
The bottom pins are added to row 18, down from the middle, with 13 sts in between.
Create the indents in the same way as you did with the first and second ones, again do not tighten as much as before. Your final shape should look as per the image below.

Assembly:
Mouth:
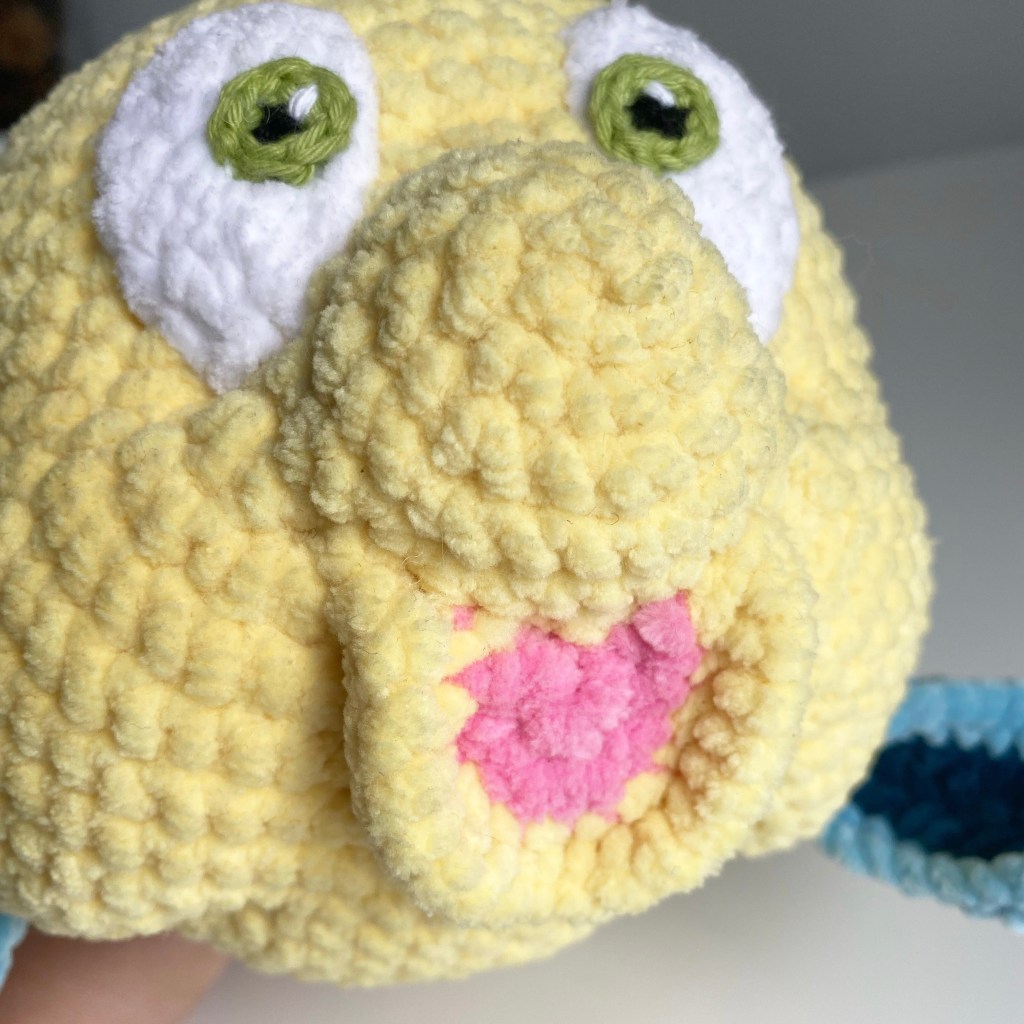
Attach the mouth to row 6, just below the “nose”. Only sew through the top sides of the mouth and then the inner ring of yellow so that the edges of the mouth are curved, see image below.
Eyes:
Attach the pupils to the white part of the eye, they should sit 1 row in from the edges and centred to the height of the white part. Make sure the white highlights of the pupils match the placement of the other eye.
The eyes are attached to each side of the nose, the inner bottom of the eyes should align with row 6.
The top of the eye should site between row 9 and 10.
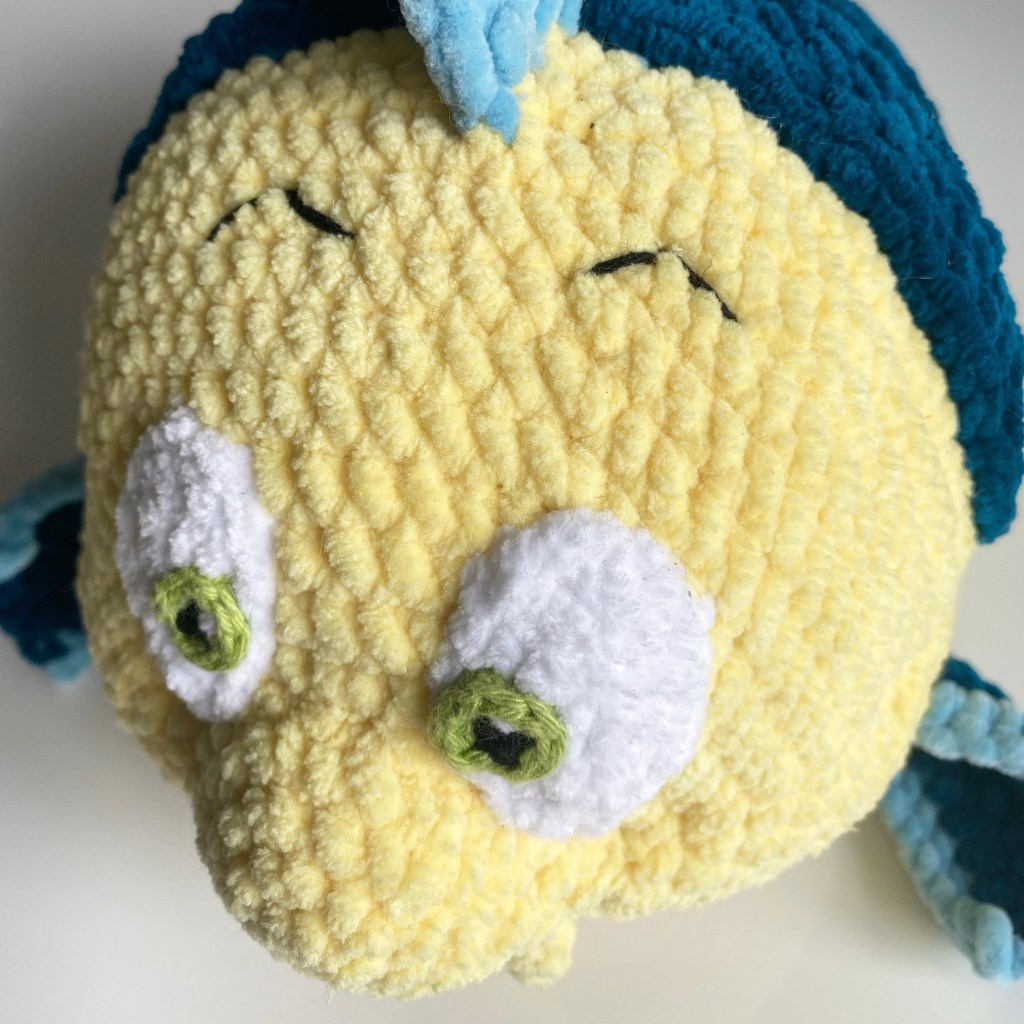
Eyebrows:
The eyebrows are sewn on using 2 sts across row 13, 4 sts wide and with 5 sts in between.
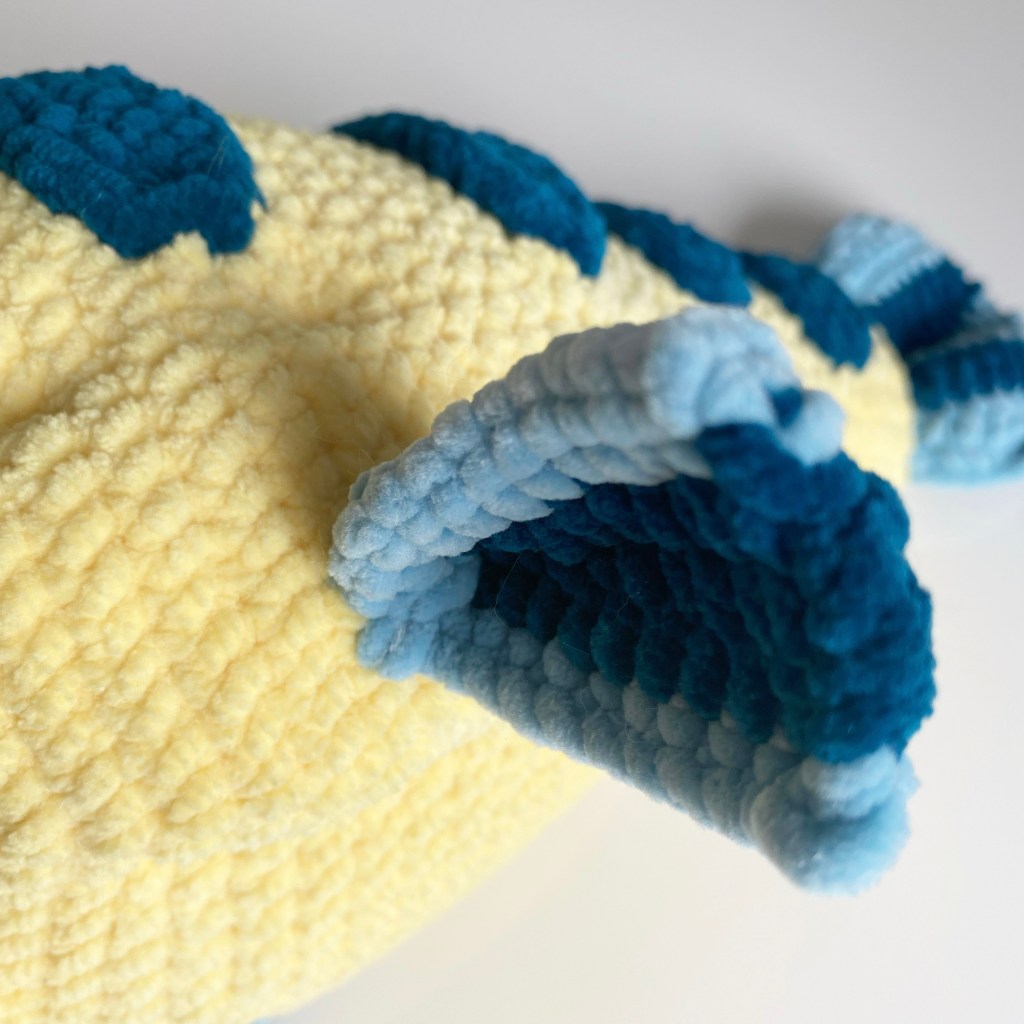
Stripes:
Going from long to short, attach the back stripes as following.
Stripe 1: Attach across row 16-18 of the body
Stripe 2: Attach across row 24-26 of the body
Stripe 3: Attach across row 32-34 of the body
Stripe 4: Attach across row 39-41 of the body

Dorsal fin:
Attach the dorsal fin to the middle of the top of Flounder, across row 14-38. To avoid the top from bending, gently stretch the top part of the fin.
Make sure to use light blue yarn to attach the light blue parts and the dark blue for the darker parts.

Tail fin:
The tail fin is attached to the last row of the body. Using pins, pin the ends of the tail to the ends of the body and pinch the middle so you get a wavy effect. When sewing, try hiding the stitches as much as possible by going through the middle of the end of the body.

Side fins:
The side fins are attached to row 16, about 8 stitches down from the longest stripe.
These should have a pinched look so when you attach them, sew through both layers.
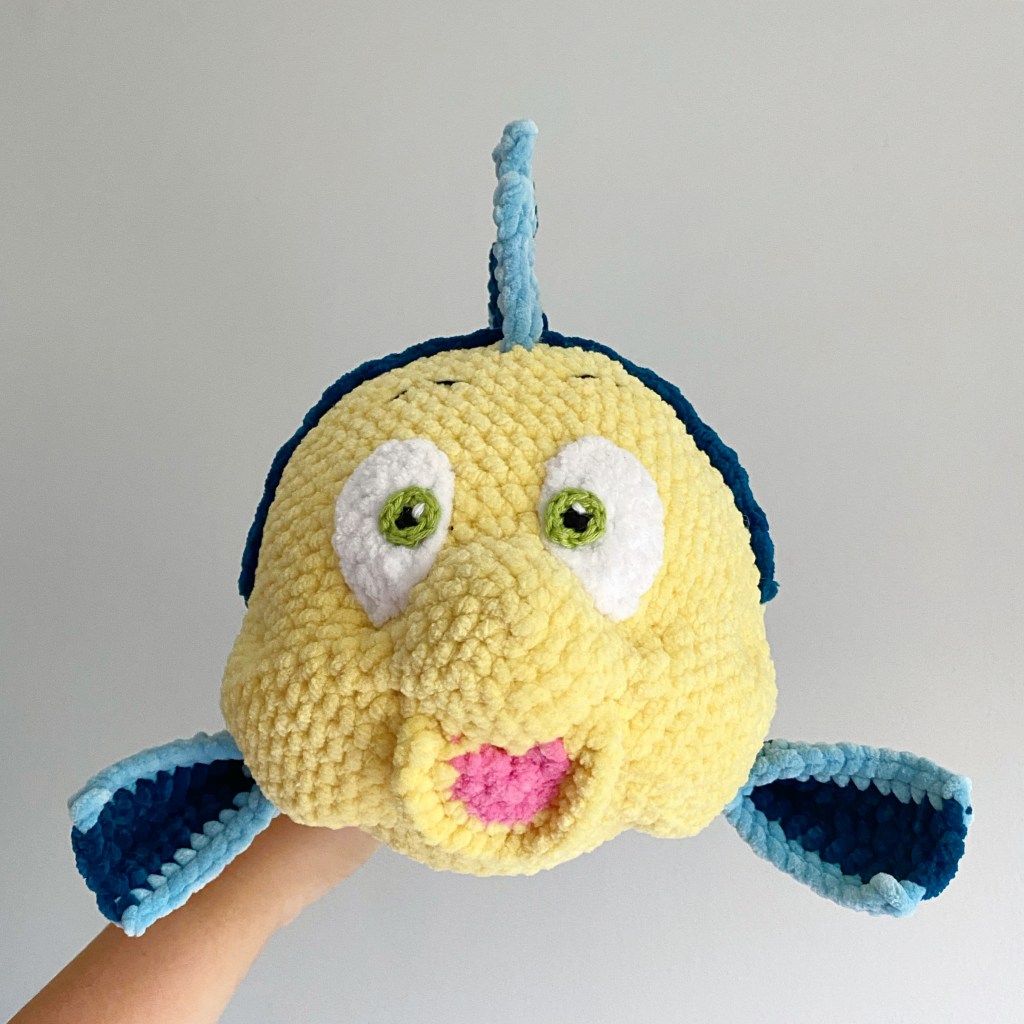
Ta-da! Flounder is complete! 🥳